目錄

Build Your Buildpack

Buildpack Tips and Tricks | KaiChu 上一篤文章中我們提到了 Cloud Native Buildpacks 專案發起的目的還有一些使用上的心得,一般的使用情境就是選擇適合的 builder (Google, Heroku, Paketo),必要時可以指定額外的 buildpack 。本篇文章稍後也會介紹如何編寫自己的 buildpack 及如何發佈至 buildpack registry

這一篇文章會告訢你什麼

  • buildpack 基本組成元件介紹
  • 手工打造自己定義 builpack (pure shell)
  • 使用 packit 建立自己定義 buildpack (Buildpacks Utils Library)
  • 怎麼透過 github action 直接發佈至 buildpack registry

這一篇文章不會告訢你什麼

Buildpack Examples:

 1
 2
 3
 4
 5
 6
 7
 8
 9
10
11
pack build test_img --path apps/test-app --builder cnbs/sample-builder:bionic

Flags:
  -B, --builder string              Builder image
  -b, --buildpack strings           Buildpack to use. One of:
                                      a buildpack by id and version in the form of '<buildpack>@<version>',
                                      path to a buildpack directory (not supported on Windows),
                                      path/URL to a buildpack .tar or .tgz file, or
                                      a packaged buildpack image name in the form of '<hostname>/<repo>[:<tag>]'
                                    Repeat for each buildpack in order, or supply once by comma-separated list
  ...

在 buildpack help 中可以看到 -b string or --buildpack strings 的參數可以額外的 buildpack,builder image 會依據 <buildpack>@<version> or <hostname>/<repo>[:<tag>] 去 buildpack registry 抓取對應的 buildpack 回來一起編譯 (local 相對目錄也是可以的)

在開始編寫自己的 builpack 時,應該就要先了解整個 buildpack 的架構、元件還有運作的模式。先看看使用 buildpack 構建的 container image 包含了那些東西,我們以使用 gcr.io/buildpacks/builder:v1 builder 構建的 container image 來分析

Pack inspect

Pack 提供了 inspect 的指令可以幫助我們檢查 container image

1
pack inspect <image-name> [flags]
 1
 2
 3
 4
 5
 6
 7
 8
 9
10
11
12
13
14
15
16
17
18
19
20
21
22
23
24
25
26
$ pack inspect ms-sample-add
Inspecting image: ms-sample-add

REMOTE:
(not present)

LOCAL:

Stack: google

Base Image:
  Reference: 9875be79e8f3fc045dc520b8da706b14b07784aaec003e243c0a9d2050993f0a
  Top Layer: sha256:38407137fb1d65f4597f0dce78ac3b249dbfc247c30c4061981eb92b0fce4127

Run Images:
  gcr.io/buildpacks/gcp/run:v1

Buildpacks:
  ID                        VERSION        HOMEPAGE
  google.go.runtime         0.9.1          -
  google.go.build           0.9.0          -
  google.utils.label        0.0.1          -

Processes:
  TYPE                 SHELL        COMMAND        ARGS
  web (default)                     /layers/google.go.build/bin/main

由 Pack inspect 指令出輸結果,有幾個部份跟我們如要自定義 buildpack 時的概念有關係, Stack, Buildpacks, Processes 還有稍早到的 builder

Stack

由上一節 pack inspect 可以看出,Stack 是由 Base Image + Run Images 二個部份組合而成 (pack stack suggest)

  • Base Image 的工作基本上就是生命周期中用來處理 build 工作的基底 container image,必要的時候是可以進行擴充的
  • Run Images 則為最後應用程式執行環境的基底 container image,必要的時候也是可以進行擴充 (上一篇文章中就遇到 gcr.io/buildpacks/gcp/run:v1 中不包含 /usr/share/zoneinfo 會導易 golang 程式在執行時區相關操作時報錯,而採用擴充 run image 來解決,Google 也更新了 run image 來解進這個問題)

Buildpacks (packaged in a builder)

A buildpack is a unit of work that inspects your app source code and formulates a plan to build and run your application.

Buildpack 就是每一個工作內容的最小單元,Buildpack 中定義在構建 container image 的生命周期中的事件 Detect, Analyze, Restore, Build, Export, Create, Launch, Rebase 需要作什麼動作

Output log Example:

 1
 2
 3
 4
 5
 6
 7
 8
 9
10
11
12
13
14
15
16
...
  Network Mode: 
===> DETECTING
======== Results ========
pass: cage1016/[email protected]
Resolving plan... (try #1)
cage1016/jq-cnb 1.0.0
===> ANALYZING
Previous image with name "test_img" not found
===> RESTORING
===> BUILDING
URI -> https://github.com/stedolan/jq/releases/download/jq-1.6/jq-linux64
Downloading dependency...
Moving dependency...
===> EXPORTING
...

當我們有需求要編寫自定義的 buildpack 時則最少需要包含三個檔案

  • buildpack.toml: 提供 builpack 相關的資訊,如 id, version, License 等等
  • bin/detect:)提供要套用當前 buildpack 的邏輯,如 pip 的 buildpack 檢查是否有 requestments.txt,沒有包含就跳出
  • bin/build: 承上面的範例,實作操作 pip 安裝對應的套件

bin/detect & bin/build 是為需要可執行的檔案,簡單就是 shell script, 不過也有一些工具 paketo-buildpacks/packit Buildpacks Utils Library 及 paketo-community/bootstrapper (bootstrap 工具包快速構建 cnb 專案框架),使用 Golang 語言來產出 bin/detect, bin/build 的 binary 檔案供 Pack 指令直接使用

Builder

/zh-tw/posts/build-your-buildpack/img/create-builder.svg
builder
(ref: https://buildpacks.io/docs/concepts/components/create-builder.svg)

A builder is an image that contains all the components necessary to execute a build. A builder image is created by taking a build image and adding a lifecycle, buildpacks, and files that configure aspects of the build including the buildpack detection order and the location(s) of the run image

簡單來說 builder 就是幫你準備的元件(稍早提到的 Stack,Buildpack 等等),依照定義堆疊的順序(builder.toml)來幫你打包構建 container image

https://github.com/GoogleCloudPlatform/buildpacks/blob/main/builders/gcp/base/builder.toml#L31-L45

 1
 2
 3
 4
 5
 6
 7
 8
 9
10
11
12
13
14
15
16
17
18
19
20
21
22
23
24
25
26
27
28
29
30
31
32
33
34
35
36
37
38
39
40
[[buildpacks]]
  id = "google.go.runtime"
  uri = "go/runtime.tgz"

[[buildpacks]]
  id = "google.go.build"
  uri = "go/build.tgz"

[[buildpacks]]
  id = "google.go.gopath"
  uri = "go/gopath.tgz"

[[buildpacks]]
  id = "google.go.functions-framework"
  uri = "go/functions_framework.tgz"

######
# Go #
######

[[order]]
  [[order.group]]
    id = "google.go.runtime"

  [[order.group]]
    id = "google.go.functions-framework"

  [[order.group]]
    id = "google.go.build"

  [[order.group]]
    id = "google.config.entrypoint"
    optional = true

  [[order.group]]
    id = "google.go.clear_source"
    optional = true

  [[order.group]]
    id = "google.utils.label"

gcr.io/buildpacks/builder:v1 來說,支援了 Go 1.10 +, Node.js 10 +, Python 3.7 +, Java 8, 11, .NET Core 3.1,所以我們會發現為了兼容這些程式語言,builder 中包含了非常多的 buildpack,並且描述了這些 buildpack 在對應語言中的順序

如稍早透過 pack inspect 指令看到 Buildpacks: cage1016/ms-demo-add

1
2
3
4
  ID                        VERSION        HOMEPAGE
  google.go.runtime         0.9.1          -
  google.go.build           0.9.0          -
  google.utils.label        0.0.1          -

cage1016/ms-sample-add 是一個 Golang 編寫的應用服務,在使用 gcr.io/buildpacks/builder:v1 構建 container image 中我們可以看到 buildpack 就是 GoogleCloudPlatform/buildpacks 中對於 Golang 語言中所指定的三個 google.go.runtimegoogle.go.buildgoogle.utils.label, 至於沒有 google.go.functions-framework 是因為我們特別指定 Google Cloud Function 所需特別的參數,Pack 也就沒有將 google.go.functions-framework 一同構建至 container image 的 buildpack 中

Build your first buildpack

在大至上了解 buildpack 的基本概念(Stack, buildpack, builder) 之後,就可以開始編寫我們自定義的 buildpack。這一次我們需要在 container image 中加入 jq 的 command 供後序使用

alpine Dockerfile

RUN apk add –update jq && rm -rf /var/cache/apk/*

Dockerfile 的角度來說要在 container image 中加入 jq 只需要指定 jq 的名子就好。而在 buildpack 的框架下,就有幾種選擇

  1. 如果是在 container image 構建過程中,可以擴充 builder image,基於 builder 的 image 再往上疊,GoogleCloudPlatform/buildpacks: Extending the builder image
  2. 如果是在執行環境需要,可以擴充 run image,基於 builder stack 的 run image 再往上疊,GoogleCloudPlatform/buildpacks: Extending the run image
  3. 另一種方式就是編寫一個 inject jq 的 buildpack,再需要 jq 的時候透過 pack --buildpack <<buildpack>@<version>> 來加入,我們這一次就選擇自建 jq buildpack,部署之後也方便使用

稍早有提過,編寫一個 builpack 最少需要有 3 個檔案,buildpack.toml, bin/detect, bin/build

1
2
3
4
5
├── jq-cnb
│   ├── bin
│   │   ├── build
│   │   └── detect
│   └── buildpack.toml

準備好 3 個檔案就可以選擇 builder 來構建 buildpack 的 container image (這時候要注意的事情是,話說 builder 會按照 spec 來打包,實事上 builder 實作上還是有些語不同,選擇 builder 上要注意,且 builder 的 stack id 需要列在 buildpack.toml 上的白名單上,不在白名子的 id 會因安全性議題無法編譯)

使用 pack build 測試我們的 buildpack

1
pack build test-jq-run --builder gcr.io/buildpacks/builder:v1 --buildpack ./jq-cnb --path <empty-folder>

構建完 container image 後可以使用 dcoker run 來檢查 jq 是否可以正常工作

1
2
3
4
$ docker run --rm test-jq-run "echo '{\"foo\": 0}' | jq ."
{
  "foo": 0
}

使用 pack inspect 來看看我們構建出來的 container image test-jq-run,其中 buildpack 區塊正常的顯示我們在 buildapck.toml 中描述中的 id 一樣

 1
 2
 3
 4
 5
 6
 7
 8
 9
10
11
12
13
14
15
16
17
18
19
20
$ pack inspect test-jq-run
Inspecting image: test-jq-run

REMOTE:
(not present)

LOCAL:

Stack: google

Base Image:
  Reference: 41b0f9df90f26562392b58280ade9df13e8020d4dd8e56e79910f48f4946a98e
  Top Layer: sha256:50ba10dd399f2f5fed9657b403f3bc3a2cea534620c3921143e1ac92037ab43b

Run Images:
  gcr.io/buildpacks/gcp/run:v1

Buildpacks:
  ID                     VERSION        HOMEPAGE
  cage1016/jq-cnb        1.0.0          -

Buildpacks Utils Library

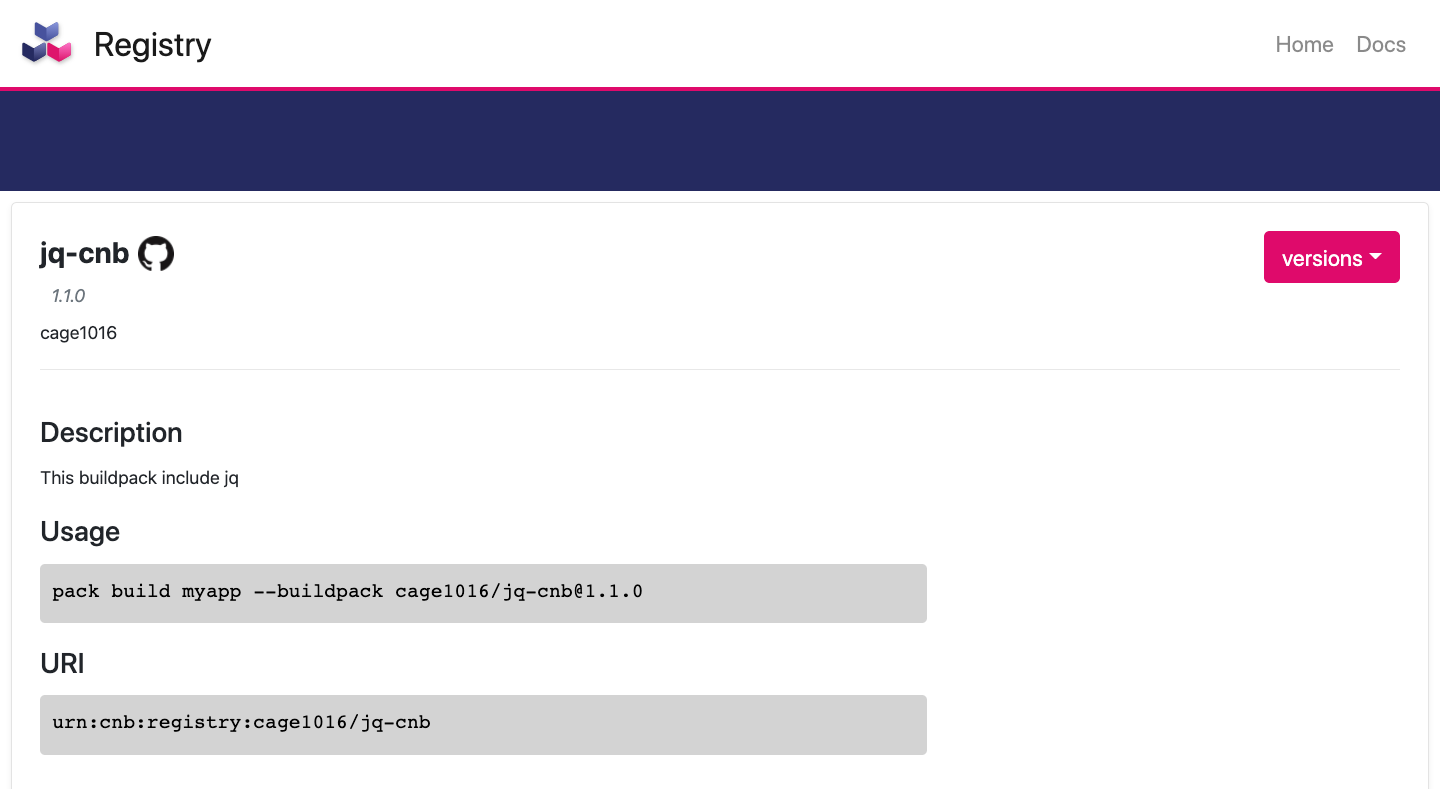
cage1016/jq-cnb: A Cloud Native Buildpack that include jq

上一節我們使用 shell 的方式來試範如果自定義一個簡單的 buildpack。簡單,但是複雜一點的官方 範例 就會覺得 shell 不是那麼好寫,難是在要符合 buildpack 的 規範 需要花時間去了解,所以這時候有一些工具來快速發起空專案就是一個好選擇

cage1016/jq-cnb 就是採用 paketo-buildpacks/packit Buildpacks Utils Library 為基礎來改寫上一節的 shell 程式碼,詳細的程式碼請直接連結至 github 頁面查看,邏輯基本上是一致,不同之處就是由 shell 的部份轉換成對 Buildpacks Utils Library 的操作。沒有誰好誰壞,端看大家喜歡用什麼方式

deploy pack to buildpack registry

.github/workflows/release.yaml

 1
 2
 3
 4
 5
 6
 7
 8
 9
10
11
12
13
14
15
16
17
18
19
20
21
22
23
24
25
26
27
28
29
30
31
32
33
34
35
36
37
38
39
40
41
42
43
44
45
name: Release
on:
    release:
        types:
            - published
jobs:
    register:
        name: Package, Publish, and Register
        runs-on:
            - ubuntu-latest
        steps:
            - id: checkout
              name: Checkout code
              uses: actions/checkout@v2
            - if: ${{ github.event_name != 'pull_request' || ! github.event.pull_request.head.repo.fork }}
              name: Login to GitHub Package Registry
              uses: docker/login-action@v1
              with:
                registry: ghcr.io
                username: ${{ github.repository_owner }}
                password: ${{ secrets.GHCR_TOKEN }}
            - id: setup-pack
              uses: buildpacks/github-actions/[email protected]
            - id: package
              run: |
                #!/usr/bin/env bash
                set -euo pipefail
                BP_ID="$(cat buildpack.toml | yj -t | jq -r .buildpack.id)"
                VERSION="$(cat buildpack.toml | yj -t | jq -r .buildpack.version)"
                PACKAGE="${REPO}/$(echo "$BP_ID" | sed 's/\//_/g')"
                pack package-buildpack --publish ${PACKAGE}:${VERSION}
                DIGEST="$(crane digest ${PACKAGE}:${VERSION})"
                echo "::set-output name=bp_id::$BP_ID"
                echo "::set-output name=version::$VERSION"
                echo "::set-output name=address::${PACKAGE}@${DIGEST}"                
              shell: bash
              env:
                REPO: ghcr.io/${{ github.repository_owner }}/buildpacks
            - id: register
              uses: docker://ghcr.io/buildpacks/actions/registry/request-add-entry:4.1.0
              with:
                token:   ${{ secrets.PUBLIC_REPO_TOKEN }}
                id:      ${{ steps.package.outputs.bp_id }}
                version: ${{ steps.package.outputs.version }}
                address: ${{ steps.package.outputs.address }}

其實 buildpack 已經打造了一些工具來幫助開發者快速部署 Tools · Cloud Native Buildpacks,本次的範例就是使用 Github action + Release 自己發佈,實際的內容也是 Github action 中使用 pack package 方法的一些操作,當成功 release 之後就可以在 buildpack registry 中查詢的到 https://registry.buildpacks.io/buildpacks/cage1016/jq-cnb

/posts/build-your-buildpack/img/jq-cnb.png

最後我就可以直接使用

1
2
3
mkdir null-folder
echo -n 1.5 > null-folder/.jq-version # optional, default is set to 1.6
pack build test-new-jq-run --path ./null-folder -b cage1016/[email protected] --builder gcr.io/buildpacks/builder:v1 -v && docker run --rm test-new-jq-run "echo '{\"foo\": 0}' | jq ."
 1
 2
 3
 4
 5
 6
 7
 8
 9
10
11
12
13
14
15
16
17
18
19
20
$ pack inspect test-new-jq-run
Inspecting image: test-new-jq-run

REMOTE:
(not present)

LOCAL:

Stack: google

Base Image:
  Reference: 41b0f9df90f26562392b58280ade9df13e8020d4dd8e56e79910f48f4946a98e
  Top Layer: sha256:50ba10dd399f2f5fed9657b403f3bc3a2cea534620c3921143e1ac92037ab43b

Run Images:
  gcr.io/buildpacks/gcp/run:v1

Buildpacks:
  ID                     VERSION        HOMEPAGE
  cage1016/jq-cnb        1.1.0          https://github.com/cage1016/jq-cnb

Reference